Tealight Tutorial
Things are slowly getting back to a familiar schedule for my household. You know, the cleaning, the GCs coming over and taking control the house with their toys and choice of movies. Always fun to watch the interaction with them.
I mentioned in an earlier post that I would have a tutorial on the tealight that I posted a few posts back, so here it is.
I learned how to make this tealight candle cake when I was at BenFranklin Crafts, so I hope Joy and the gang won't mind my creating a tutorial for it.
I love that these little cuties operate on batteries. It's a great project to use those left over pieces of scrapbook/cardstock scraps. You know us crafters, we don't like to throw much of anything away (I swear, I'm not a hoarder, oh oh. I'm not in denial either. I mean...Oh forget it).
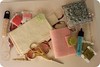
So, here are the things you'll need:
 |
| tealight, 1/2" by 5" strip of paper, 2 2" scallop circles |
|
 |
| assorted flower punches and scallop punch |
|
 |
| I like to have some pre-punched flowers on hand |
 |
| double stick tape, snail glue, tacky glue, foam pad & stylus,scallop template |
To start, cut a piece of cardstock 1/2" by5" and add glue of your choice to one long side of strip, then wrap entire strip around your tealight. I used a brown strip of cardstock on my cake so that it would look like chocolate.
 |
| I love chocolate |
|
|
|
|
|
|
|
Using the 2 inch scallop circles punch, cut out 2 circles, one is for your frosting and the other is your cake tray/plate.
What helps for the next step is to make a template of the 2" scallop circle out of any type of paper. I used an expired ad flyer. I folded it in forths to find the center, then cut a tiny circle of about 3/16". Use this as a template to find the center for your frosting.
 |
| my cream cheese frosting |
In the above photo, I cut my center circle using the template, then I cut a few tiny slits in the circle so that it can easily fit over the flame of the tealight. So that you can easily smooth the outer edge of the frosting over the side edges, make tiny slit into the indentations of the scallops.
 |
| On outer edge, cut tiny slits into scallop indentations |
Now you're ready to attach your frosting to your cake. You can use mini glue dots or tacky glue to glue frosting to the cake. I wanted to do this in a hurry so I used mini glue dots on each scallop. Pricey cake!
 |
| mmmm...cream cheese frosting |
Using the other scallop circle, which is the plate or tray of your cake, hold the circle to the bottom of the tealight and rub your finger on the paper where the light switch is. This will create an indentation of where the switch is. Using a 1/8" hole punch, punch the indentation a couple of times so that your piece looks like the photo below.
 |
| 2 hole punches overlapping each other |
|
Glue your tray/plate to the bottom of your cake, making sure the hole you punched clears the light switch.
 |
| almost done |
|
Now the decorations begin. Using whatever flower punches you have, you can punch an assortment of flowers using your scrap cardstock or scrapbook paper. I've seen some gorgeous tealight cakes with ribbon roses too. I used the foam pad and stylus to give some dimension to my flower punches.
 |
| just move the stylus in tiny circles or press stylus into each petal |
Use tacky glue to adhere flowers and leaves or whatever you want to decorate your cake.
I think there's a Bigz three-tier cake diecut. This tealight cake would look great as the topper.
Aloha for now,